| Details: |
| E-mail Address Auto-Complete Outlook 2010 & Outlook 2013 have a feature called "Email Address Auto Complete". This feature allows you to type an email address into the "TO:", "CC:", or "BCC" fields. Outlook will display a list of corresponding e-mail addresses from the auto-complete cache. For example, e-mail addresses that you have already used. |
| Solution: |
| To Clear the E-Mail Cache:
Solution 1: Manually Delete (For ALL Versions of Outlook)
1. Open Outlook.
2. Type the e-mail address you wish to clear from the cache.
3. Press the Down-Arrow button (on the keyboard) to select the e-mail address.
4. Press the Delete button (on the keyboard).
5. That e-mail entry is now removed from the Outlook Auto-complete cache.
Solution 2: Empty Auto-Complete List Button (ONLY for Outlook Versions 2010 & 2013)
1. Open Outlook.
2. Click File | Options.
3. Click on the Mail tab on the right.
4. Scroll down to Send messages and click the Empty Auto-Complete List button.
|
Tuesday, May 26, 2015
How to clear the Email Cache in Outlook 2010 & 2013
Cache Mode is gray out on Outlook 2010
| Details: |
| This article will provide a workaround to enable or disable Cache Mode on Outlook 2010 when the check box is gray out. |
| Solution: |
| To Enable Cache Mode on:
1. Open REGEDIT
2. navigate to the following registry: HKEY_CURRENT_USER\Software\Policies\Microsoft\Office\14.0\outlook\cached mode
3. Modify Value on dword "Enable"=dword to 1
4. Close Registry Editor
5. Restart Outlook
To Disable Cache Mode on:
1. Open REGEDIT
2. navigate to the following registry: HKEY_CURRENT_USER\Software\Policies\Microsoft\Office\14.0\outlook\cached mode
3. Modify Value on dword "Enable"=dword to 0
4. Close Registry Editor
5. Restart Outlook
|
Friday, May 22, 2015
Removing Foreign Aggregate on NetApp ONTAP 8.2.1 Cluster Mode
So After installing a SAS Disk Shelf and assign ownership for all new disk, I notice that old aggregates from the previous filer were created as Foreign, This is a big problem. After doing some research, I was able to find the solution on a great KB from NetApp KB 1013046 using the Aggregate Destroy Command.
Note: Be very careful while going through this process as you can delete the wrong aggregate and it almost near impossible or impossible to restore an aggregate.
Here are the steps I follow it:
1. SSH to the Cluster.
2. Then Run the system node run -node * -command sysconfig -r command to identify the aggregate on Foreign State:
If the above output is to overwhelm, you can also uses the aggr status for each node by running the following command:
system node run -node <nodename> -command aggr status
Notice that the Output is more clear to identify does foreign aggregates.
3. Now that we identify does Foreign aggregates as well on which node, first we need to enable the Aggregate Destroy command since by default is not enable. To do so we will need to run the following command:
node run -node <node_name> options nodescope.reenabledcmds 'aggr=destroy'
4. Once Aggregate Destroy is enable, we are deleting does aggregate by typing the following command:
system node run -node <nodename> -command aggr destroy <aggregate_name>
5. Confirm by selecting yes
6. After removing those aggregates, we will disable the Destroy command option. This will bring back the other command options that were locked previously such aggregate status. To do so, run the following command:
node run -node <nodename> options nodescope.reenabledcmds ' '
7. Let confirm if those foreign aggregates were remove. Run the following command:
system node run -node <nodename> -command aggr status
As you notice on the above image, those foreign aggregates are now gone.
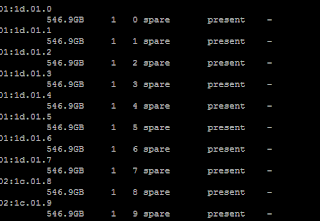
8. After I deleted those aggregates, I proceed to verify the status of my SAS disk by running the command disk show -type SAS
Notice all my disks are now spare and they are not part of an aggregate.
If you are running OPTAP 8.3 and later versions, please refer to the NetApp KB 1013046.
Subscribe to:
Posts (Atom)


